Understanding Dust 2: Essential Callouts Every Player Should Know
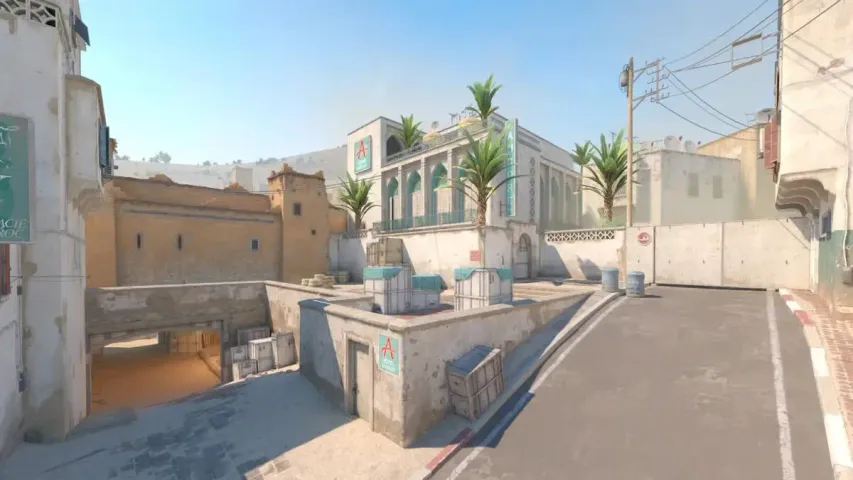
When it comes to playing Counter-Strike: Global Offensive, understanding the map Dust 2 is crucial for success. Known for its balanced layout and dynamic encounters, Dust 2 features several key areas that players must be familiar with to improve their gameplay. Some of the essential callouts include Long A, Catwalk, Mid, and B Site. These callouts not only streamline communication with teammates but also enhance strategic planning during both offensive and defensive rounds. Mastering these locations allows players to make informed decisions, ultimately leading to higher chances of victory.
In addition to the main callouts, players should also pay attention to specific positions within these areas. For instance, knowing where AWP snipers might hold in Top Mid or understanding the common hiding spots in B Tunnels can shift the dynamics of a match. Here are some secondary callouts to remember:
- Goose - A common hiding spot on A site.
- Site - The bomb planting area.
- Ninja - A sneaky position near the A Site.
By integrating these callouts into your gameplay, you can significantly enhance your team's coordination and tactical execution on Dust 2.
Counter-Strike is a popular first-person shooter game that has garnered a massive following since its release. Players compete in teams, with one side typically taking on the role of terrorists and the other as counter-terrorists. For those interested in the game’s economy and skin trade, check out the Top-Gewinner von CS2 Skins to see the latest trends and top earners.
Top 10 Advanced Strategies for Mastering Dust 2
Dust 2 is a classic map in the world of competitive gaming, particularly in Counter-Strike: Global Offensive. To truly master this map, players must adopt advanced strategies that go beyond basic tactics. First and foremost, communication among team members is vital. Establishing clear roles and callouts can significantly enhance your team's performance. For instance, having a dedicated AWPer covering long A or a lurker waiting for opportunities in lower B can help control key areas and dictate the pace of the game.
Another essential strategy is to familiarize yourself with utilization of utility like smoke grenades, flashbangs, and Molotovs. Properly placed smokes can block sightlines, allowing your team to execute strategies more effectively. Additionally, learning how to leverage map control can provide your team with valuable information about enemy positions. For example, taking control of mid can open up opportunities for simultaneous attacks on both bomb sites, overwhelming the opposition and increasing your chances of winning the round. Whether you're playing with friends or in a competitive setting, mastering these advanced strategies on Dust 2 can greatly elevate your gameplay.
How to Optimize Your Smoke Grenades on Dust 2: Tips and Tricks
Optimizing your smoke grenades on Dust 2 can significantly improve your team's overall strategy and performance. First, it's essential to understand the key choke points and common engagement areas on the map, such as Mid, B Site, and A Site. Utilize smoke grenades to block sightlines and create cover during crucial pushes. A well-placed smoke grenade on Catwalk can effectively obscure enemy vision, which may allow you to safely advance or plant the bomb without being exposed. Remember to practice your throws in offline mode to perfect the release timing and angles needed for your smoke grenades.
In addition to placement, timing is crucial when you employ your smoke grenades. To maximize their effectiveness, consider using them in conjunction with other utility, such as flashbangs or Molotov cocktails, to disorient your opponents. A helpful technique is to throw your smoke grenade right after a teammate throws a flashbang, ensuring that your enemies are blinded just as the smoke deploys. You can also coordinate with your team to layer multiple smokes across different pathways, effectively creating safe routes for engagement or retreat. Utilize voice comms or pings to inform your team when you plan to throw your smokes to ensure a cohesive strategy on Dust 2.